Rendering in MODO
I wouldn't try to recreate a complete rendering course here, because it's already been done very well by an artist I have a huge amount of respect for, Richard Yot, and his tutorials are an invaluable resource that every MODO user should own. My personal favorite is the "Rendering Interiors" set, which you can find here. It will answer the vast majority of questions you'll have about any rendering problems, and Richard proves each step with very clear, side-by-side examples, showing both the render quality achieved, as well as the render times to achieve it. Richard's more recent "Shading Master Class" is also highly informative, and is updated for MODO 901 at this time.
My objective here is to provide you with the basics, as well as to pass on some lessons I've learned over the years. I'll start with some examples from MODO 701 and 801, and move on to MODO 901 in the following pages. So, let's begin!
 Introduction and Objectives:
I won't bore you with my whole history in computers, but it is worthwhile pointing out that "perspective is everything". I simply mean that when I started trying to create 3D objects on a computer in the early 1980's, we had a different idea about what was "good", or even "realistic". For example, have a look at the very simple (Carrara) model on the right. In one sense, it's "realistic", in that is depicts a 3D shape, shows some lighting effects, and could be rotated for different viewpoints, etc.. But by any modern standards, it's obviously "synthetic".
More than 30 years later, many of us judge 3D work based on how photorealistic it is, and "conceptual" 3D, like this image, is often considered "clunky". We simply have so much computer memory and processing power today, even in a basic consumer desktop computer, that these things are possible for almost everyone to create.
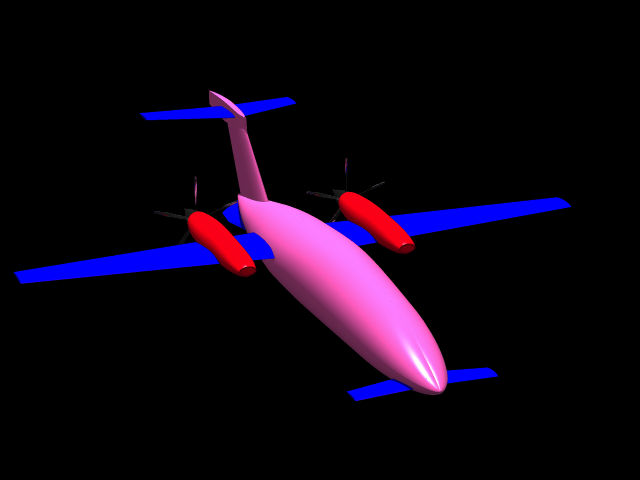
I often fall into this trap, too. Since I like to work on scale models of real-world objects, it naturally follows that we try to make the renders look "real". I'll show examples of both here, but will assume that photorealism is what you're after. The following pages compare my experiences with the MODO renderer from version 701 through the current 901. (Although I started with version 302, discussing those earlier versions would be irrelevant for most of us.)
Defaults, and returning to them:
If you open the online help system within MODO, and look at the sections on rendering, you'll find screen captures of all the important default settings. So, remember where those are, in case you get lost, while fiddling with settings, and know you can always return to them.
The default rendering settings that ship with MODO make perfect sense. They're optimized so that a brand new user can create reasonable images in a reasonable amount of time, with very little difficulty. However, just as with the modeling tools, MODO's renderer is "modular" or "decoupled", which gives a virtually infinite combination of settings you'll want to explore, both for creative reasons, and to solve problems.
Dynamic Range:
MODO's default settings yield medium-range images, which is one reason they typically render quickly. But, MODO's renderer works in full floating-point precision, designed for high-end workflows, and can not only use HDR images for image-based lighting, but can also produce high dynamic range images, in "unclamped" mode. I'll discuss the default medium-range settings first, with more on the "unclamped" style in the next few pages.
 How much time do you have?
Step one, if you're new to 3D or new to MODO, is that you've got to expect to spend time learning. That means reading articles, purchasing tutorials, watching videos, and of course, practicing the skills yourself. We've come a long way over the years, but 3D is still not something that would typically be described as either "easy" or "fast".
Then, there's hardware. Your computer will work hard, doing all the math to produce photorealistic 3D images, so the better it is, the happier you'll be. interactive preview renders like MODO's, and low-res tests are good while you're building up your scene, but the only proof of success is a "final" render. That's when the details come out, and you may find errors like noise, or issues with your lighting, materials, animation, etc., that you want to change This means that you'll pause often during the final part of your project to produce these renders, and they can take time. Buy the best computer, with the most RAM you can afford, to make this process go somewhat faster.
What is "more", when it comes to detail? This is an interesting question, especially important when it comes to render times. I'm the type who enjoys modeling details, and obviously, the more polygons, lights, and textures you have in a scene, the longer the render times. If you're in a hurry, or you're limited in your computing power, there are things you can do to help, such as creating textures that simulate some of the detail yo might otherwise model. Those are decisions that you'll have to make, based on your scene, your computer, your time, and your needs. If you're doing this work for someone else, then they may have requirements that cause you to do things a certain way too.
Basics
 The most important thing to remember about 3D rendering is that there is no such thing as a "one size fits all" approach. Believe it when you hear that "every scene is different". In fact, even "every viewpoint of the SAME scene is different". (For example, one side will almost always be lit differently than the other.) You'll certainly fall into some habits along the way, which will include what you may think of as "default settings", but these will have to be tweaked constantly, to achieve good results. That's why professional photographers are always fiddling with lights, reflectors, different lenses, filters, angles, backgrounds, and more.
The other hugely-important thing to remember, in regard to "render settings", is that you should NEVER just arbitrarily turn up all the render settings to a high level, to solve a problem. You'll end up with very odd and confusing results, and render times that are far longer than necessary. As Richard Yot and others have pointed out, you'll have much better results if you tackle one problem at a time, and adjust only the settings required to fix them. Doing this has the side benefit of teaching you the intricacies of all the render settings, which is a major part of any 3D worker's skill set.
In order to provide you with the capability of doing accurate real-world lighting and rendering, be aware that some of MODO's material, lighting, and rendering settings are related to their scale. For the best results, always model everything at real-world scale, so that when you start playing with settings, these scale-related settings make sense. It's beneficial to everyone if we all model at real-world scale, because then we can share and trade assets freely, and they will "drag and drop" into our scenes with no adjustments required.
Be willing to step away from the computer. Sometimes, simply walking outside, stretching, and getting some fresh air will give you a new perspective and/or a more relaxed attitude. There's no point in being "deadly serious", if it causes your brain to grind to a halt, or to make rushed decisions. Try and have fun with all of this!
Materials for Rendering:
The settings below apply to MODO 801 or earlier. In 901, these can still be used, if you're using the "Energy Conserving" method of shading, rather than physically-based materials.
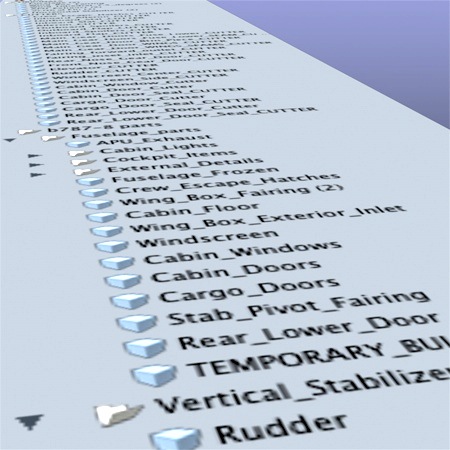
I urge you to learn about MODO's Shader Tree. It's an extremely powerful way to create and manage both materials and their rendering properties, and every minute you spend learning about it will pay off later.
Most 3D modelers understand that certain material properties are simply going to be expensive, in terms of your render times. These include transparency, reflection, refraction, caustics, subsurface scattering, and displacement. These are all great effects, and using them is one way to increase the realism of your scene. But... Come up with some methods for using "proxy", or "substitute" materials when you simply want to check your geometry or your scene layout, to save time. Save your complex materials for when they're required, and you're ready to trouble-shoot your renders. Since MODO evaluates the Shader Tree from the bottom to the top, the simplest way to override all of your materials is to place a simple shader above all your other materials, but just below the Base Shader. Many people refer to this as a "Clay" shader, because typically it will be a simple white or neutral color, with little or no reflection, and mostly just a diffuse value. You can simply click the "eyeball" symbol to the left of it to turn it off or on, whenever you want.
With the goal being photorealism, it's important to "balance" the various values of your materials, and this can be done in two major ways. The Diffuse, Reflection, Specular, and Transparency values should ideally add up to 100%. Most of the time, your Specular and Reflection values should be the same, because they are, in real life. When these values are balanced, your materials are considered to be real-world accurate. (I keep these on at all times.) One way to accomplish this is to balance them manually, as in the chart below, and this is probably a good habit to get into, just to help you understand the various properties.
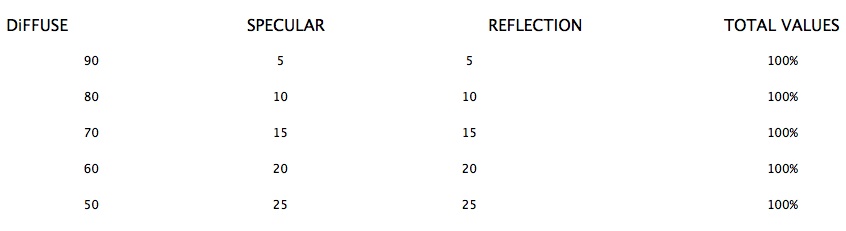
MODO provides an alternate way to do this, which you might consider "lazy", but in a good way. That is, if you check the box in your Material Properties panel labeled "Conserve Energy", and then click the box a little further down, which is labeled "Match Specular", then you only have to play with the Specular value, and MODO will adjust both the Diffuse value and the Reflection value automatically, keeping your material balanced properly. For example, if you put in a Diffuse value of 90% and a Specular value of 30%, MODO will (behind the scenes) automatically redice your Diffuse value, so that the total remains at 100%.
You can certainly alter these settings to suit your own needs... for example, to create an unreal, sci-fi material. One well-known example is the lighting scheme used in the "TRON" movies. There, it was common to have no lights in the scene whatsoever, and to use luminous colors instead. (example movie below) But if you're after photorealism, it's best to keep your material values balanced as above.
Learning on your own...
If you're new to 3D, or new to MODO, my suggestion would be to use some of the included assets (presets) that ship with MODO, and do your rendering tests on those, before diving into a major modeling project of your own. You'll learn a lot, and this will give you clues as to how to create your own models. If you look in your Content library, under the heading of "Render", you'll find a variety of assets which are designed specifically to help you set up render parameters, and also to benchmark your system's performance. You'll find threads on The Foundry forums where you can compare your results with other users, which can be helpful. The MODO community is widely known for being one of the most helpful, sharing groups around, so take advantage of all the great help you can get there.
Click the "Page 02" link below, to continue.