See the Products page for info on ALL of my 3D tutorials.
MODO by The Foundry is, in my opinion, the finest 3D modeling tool set around. I've been immersed in MODO since September of 2008, and could not be happier. Support is excellent, and the online community is absolutely wonderful. This is my second volume in the "Modeling with MODO" series. Like the first, It's set up to navigate like a web site, and includes screen-capture video at 1280 X 720, with audio. Some of the models and files in the tutorials are included too. (See below.)
I'm an advanced user, but don't consider myself a MODO "expert". MODO's capabilities are so deep that it would take anyone quite some time to truly master all of the tool combinations. And, we all work differently, so it's my hope that sharing the way I've used the tools will give you some ideas as to what will work for your own projects. At the time of this release, you might want to know that I've seen the latest The Foundry training materials, and have made a conscious effort to avoid duplicating that information.
Some of my favorite fellow artists have created step-by-step tutorials, in which you build a particular model, just as they built it. Clearly, some people like that approach. But when I watch these, I never build the model shown. Instead, I try to learn the methods, and apply them to my own work. So, as with all my previous tutorials, this one is aimed at showing you the methods and the results, but is not a "step-by-step" tutorial that ends up with you having built the same model I did. That's not the point. Learning the "how" is much more important than the "what", and so several files are included for you to use. The methods shown in this tutorial can be applied to any modeling task, so have fun with it, and go in your own direction.
- Mike James
Who is this for?
This set focuses on modeling, texturing, and rendering in MODO. It's an intermediate set of tutorials for those that have done some 3D modeling, whether in MODO or another 3D application.
PRICE: $45
Preview movies: (Over 3 Gigabytes of video included)
- Welcome to "Modeling with MODO, Volume Two" (53 MB MP4)
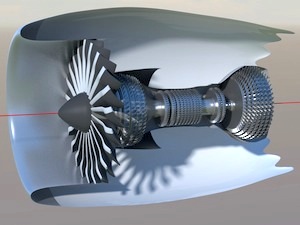
- The GEnx Turbofan - Introduction (101 MB MP4)
- How to create turbine blades (84 MB MP4)
- Controlling transparency selectively (24 MB MP4)
 General Tips, Demos, and (brief) Tutorials:
- Technically-oriented clients vs. Artistic clients
- MODO's sculpting and painting tools and Falloffs
- Sub-d modeling and "neatness"
- Using PhotoShop to compare and prepare your scale documentation
- Several "5 minutes or less" quick-modeling tutorials, for mockups.
- Modeling with fast editing in mind, for fast client turnaround
- Managing your model building to maximize resources
- Booleans in MODO revisited - Not evil, and not to be feared
- Work-in-progress web pages, images, and video, for clients (To illustrate the "why")
- Simulating spray and gasses without losing your mind
- Simulating fire with animated replicators
- Animating the color and dissolve channels for time-based effects
- Use of a "transparency control" shader to control groups of items
Modeling Methods in MODO (more detailed tutorials)
Some of the projects below are documented on my online web site. For your convenience, those articles are included in their entirety, as "Reference Articles". The tutorials themselves are all new material, not shown in those articles, and focus on the items shown in the "Purpose" column below.
Project
Purpose
Preview
The King Air Project...
How to begin, on a huge project
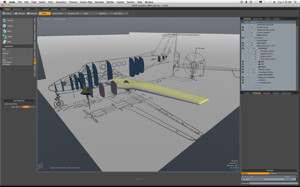
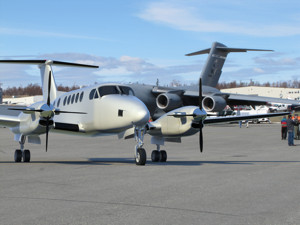
The King Air B200 was built entirely in MODO, using a combination of sub-d and hard-poly modeling. I'll take you through the whole process of obtaining the documentation, making it MODO-ready, and ensuring that everything remains accurate, during assembly.
Sometimes a single component of a project can be a major task by itself. I'll show how I went about creating the General Electric "GEnx" high-bypass turbofan engines for my Boeing 787-8 project, starting from scratch.
Thinking ahead
As always, my approach to these models is a "top down" method. This not only makes sense from a logical point of view, but (assuming that the model will become more complex over time) it's a way to guarantee that you don't run out of resources early in the game.
Client communication
When you have a project with a lot of scope, it usually isn't possible to do every render at MODO's high-quality settings. If you're charging the client by the hour, they'll appreciate the savings as much as you appreciate the savings in render time. Still, it's wise to include some high-quality renders, so they know it's possible.
I've included a section on my methods for communicating the "tech" info, without overwhelming them. because sometimes they need to know the "why" behind various methods.

Optimizing Geometry
If you have the time to do all the details you want to do, using geometry, great. But when working for a client, you'll have to balance the need for geometry with the wise use of images and textures. When done intelligently, it can be quite convincing, and both you and the client will appreciate the time savings.
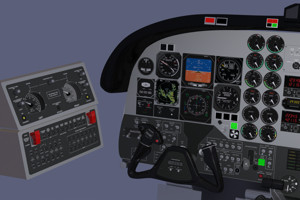
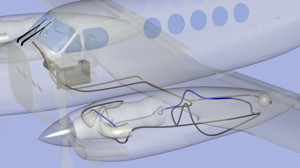
For this project, it was known in advance that many cockpit functions would be animated, but it wasn't know specifically which items. So, I created a separate file for the cockpit area alone, added what was required as we went through the project, and later imported the finalized cockpit back into the master model.
Modeling systems components
It was important to balance the difference between scale accuracy and clarity, throughout the project. So, while we adhered to engineering drawings that the students would be familiar with, we simplified most systems, to improve the clarity, and separated them into several files, for separate presentations. This kept them from becoming visual overkill, and served the purpose better than realistic renders would have.
Compositing
It's the students themselves who have requested 3D in the classroom, and so once added, it could be thought of as an "extra feature". So, some realistic renders were in order, to satisfy that need. I used a combination of environments, HDR photography, and straightforward "normal" digital photography to accomplish that, and will show you my very simple methods.
The simplest tip of all, regarding photographic backgrounds, is "Plan". The next time you're at a location where there are good photo opportunities, remember to take some shots that include empty spaces, where you can place your model. (like the small image here, from an airshow, where I intentionally photographed a wide open area, for use later)
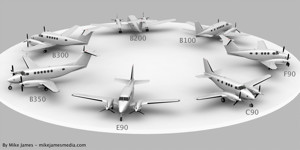
The Fleet
Although the focus of this project was the King Air "B200" model, there were six other variants created, for later use. Thanks to the solid industrial design of this aircraft series, this was far simpler than you might think. I'll show you how this was done economically, while satisfying what the client needed.
Two new projects
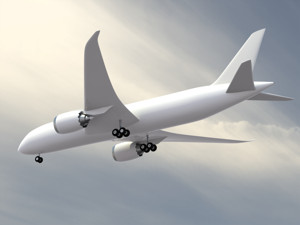
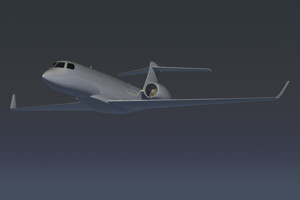
I started these two (Boeing 787-8 "Dreamliner" and Gulfstream G650 business jet) at a time when neither aircraft had flown. I had to put them aside for a while, when I realized there simply wasn't enough documentation. Now, the actual aircraft have both completed their maiden flights, and the amount of information and photos has grown rapidly. So, I'm returning to finish them both. Here's a chance to see what I do early in the modeling process, to allow for future growth.
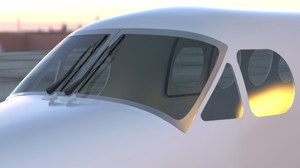
Each model has unique challenges, and I'll show various methods to deal with these problems. (like windows, on the airliner, for example) These two tutorials are good for those not familiar with scale modeling, but interested in the process. I'll show you how I work, "from the outside, in", so that each step gets finalized, scale-wise, before moving on. Regardless, save backups!
3D as a tool for artist clients
Fortunately for me, I live in a neighborhood of artists, and one of the most prolific ones is Sheila Wyne, (sheilawyne.com) She typically does very large indoor and outdoor installations. She does the art, and I do a 3D visualization of it, so that engineers and architects can focus on assembly and installation issues, making sure they're both safe and secure. It's a real "right brain/left brain" exercise, capturing at least some of the basic artistic nuances, while maintaining technical data for the installation. I live in Alaska, so outdoor installations must be secure, weatherproof, and safe from earthquakes. Indoor installations are equally important for safety and earthquake protection, but also have to consider what's available at the venue, support-wise.
Documentation was an important for all these projects as for any "technical" project, like an aircraft. We used photos, physical measurements, and were meticulous about the scale and proportions, as with any other project. The trouble is… It's a lot more difficult to measure something like a tree branch, than a typical machined part. I'll show you my methods, which worked well. The obvious advantage for Sheila was that she could get some 3-dimensional feedback on how the installations would look, before the pieces were every fabricated.
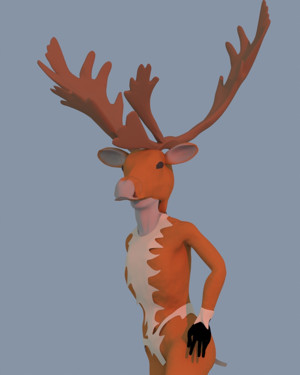
These projects used MODO's sculpting tools extensively, in many editing sessions with the artist. Some starter information was obtained from photographing and measuring her scale models, then refined in many meetings, where the artist described changes, while I did them in front of her. This was a pleasant process… Not the dreaded "client peering over your shoulder" syndrome. It was certainly challenging, since I haven't done a lot of organic modeling, but educational. Being forced to do things differently is good for all of us, and adds to our skill set.
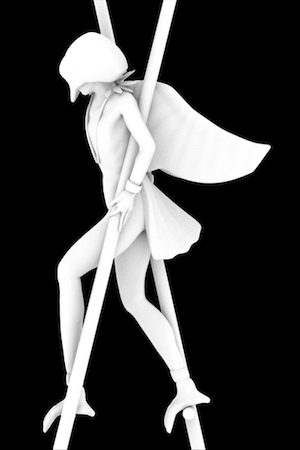
Using 3D as part of the process:
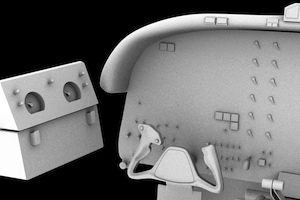
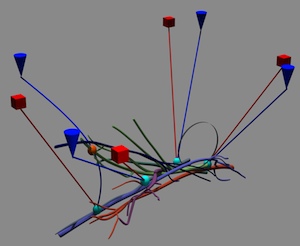
Sheila had an usual project in mind, involving the use of a large number of (organic-looking, (but fabricated) wooden and aluminum parts, for a project called "Spore". If you have a look at the image here, you can imagine how hard this project might be to visualize, either as small scale model, or on paper. None of this is "random". There were potentially a huge number of interference issues that had to be checked and eliminated. This piece is about 10 feet tall.
In this case, we made measurements of the parts to be used, and then, under Sheila's guidance, assembled the model in 3D. That let us know for sure that the interference issues were solved, and also let her experiment with rotating and moving various parts, for artistic effect. This was a practical use for 3D, in advance of the actual artwork, and also serves as a reference for the engineers later.
Construction tutorials for all these projects (except "Spore") are included. (Used with the artists' permisssion)
Scenes, Models, and Materials included:
- Exterior detailed model of the King Air B200
(I can't give you the proprietary parts or images specifically created for the client, but those are easily replaced with images you can find on the net.) - Samples of "systems" animation files are included, so you can specifically investigate the use of replicators, morph maps, keyframes, and so on. (fuel system, de-ice system, fire suppression system, and heating/cooling system)
- Exterior basic model of the Boeing 787-8 "Dreamliner"
- Exterior basic model of the Gulfstream G650 business jet
- Exterior components to use in your own models (i.e. turbine engine outline, landing gear, antenna, etc.)
- Turboprop-style Interior components to use in your own models (i.e.seats, flight controls, etc.)
- Jet fighter-style Interior components to use in your own models (i.e.seat, flight controls, etc.)
- From the organic modeling projects - Examples of using replicators to create both 2D and 3D trees