NOTE: I am not at liberty to redistribute the documentation used to build this model.
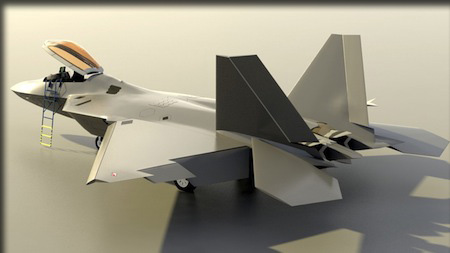
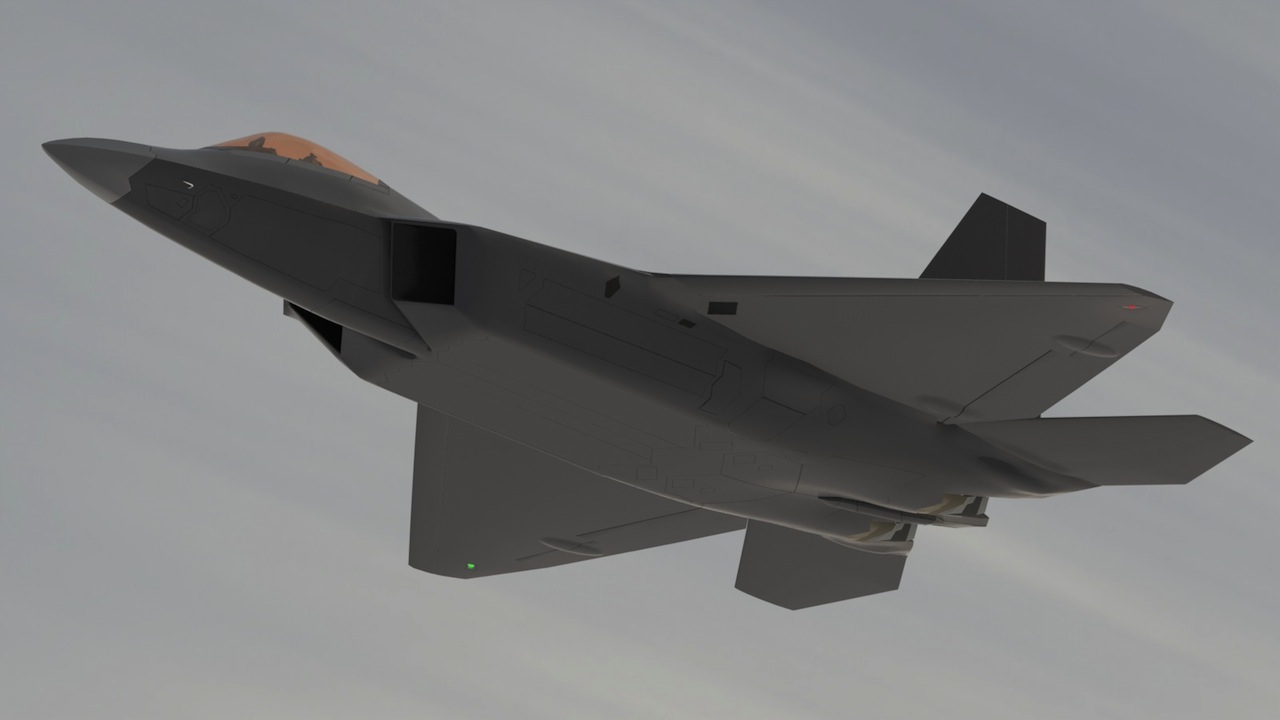
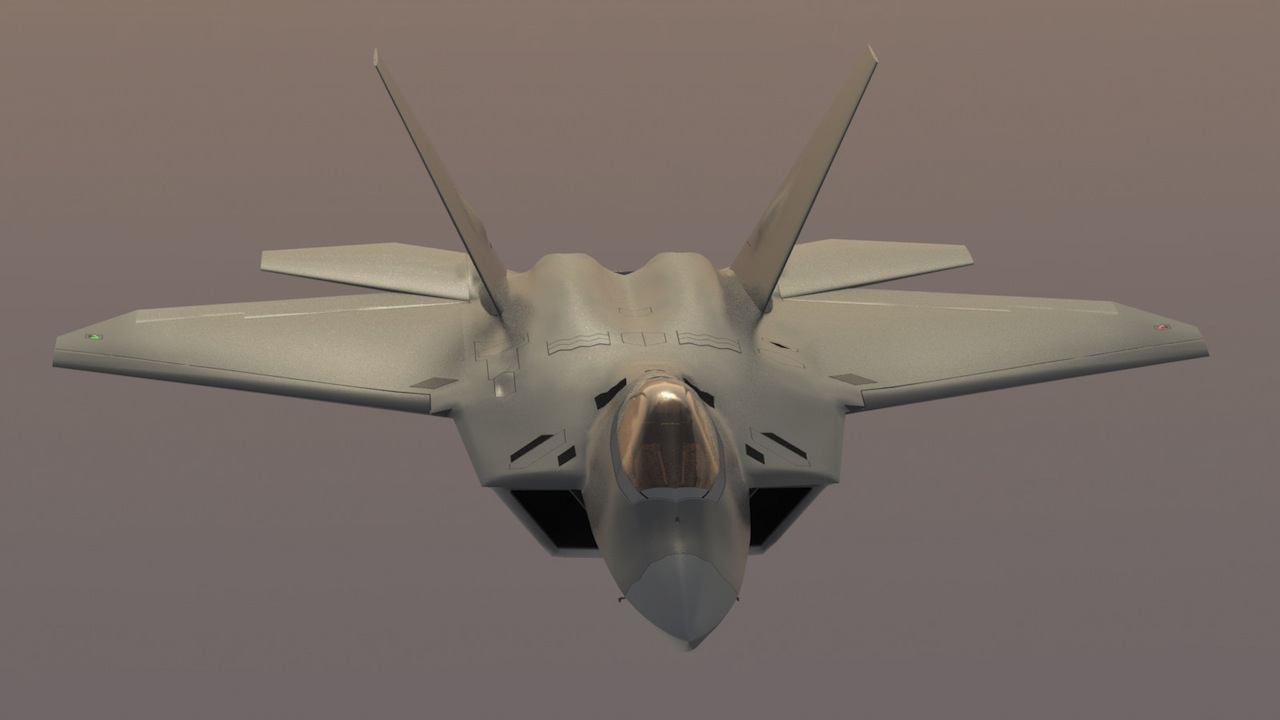
F-22 "Raptor" Project (2013)
 Much better...
Much better...
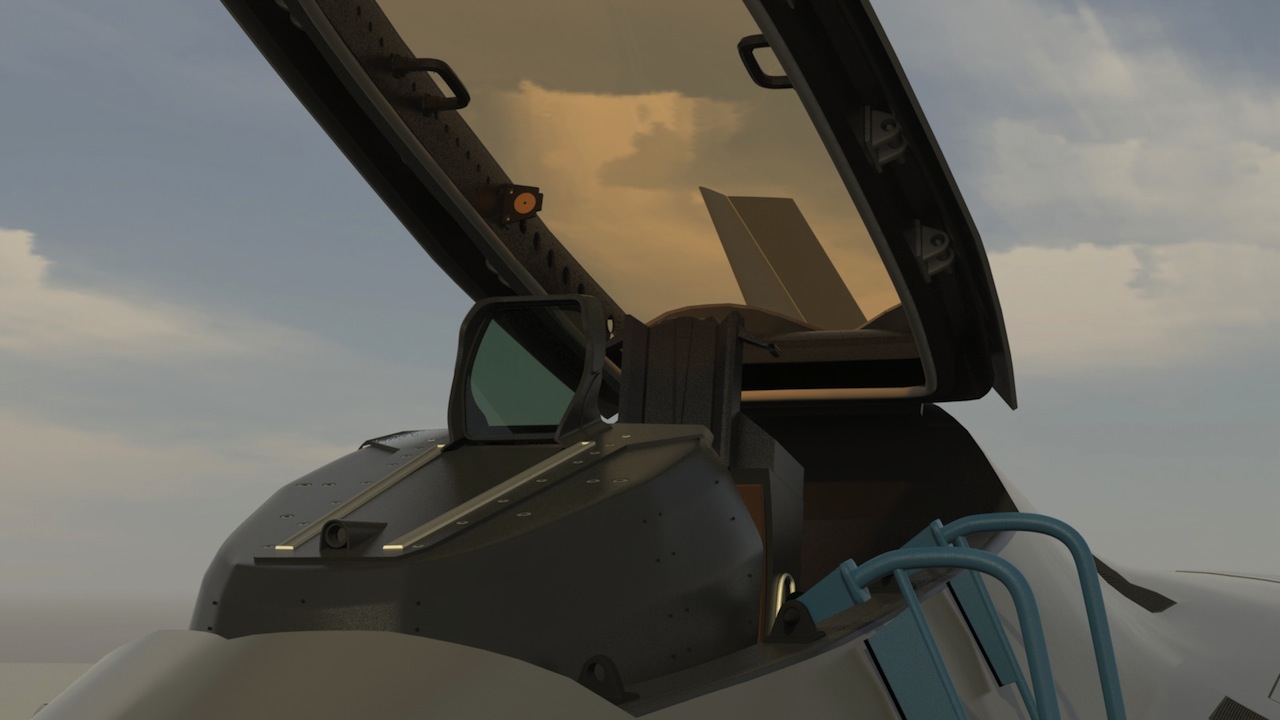
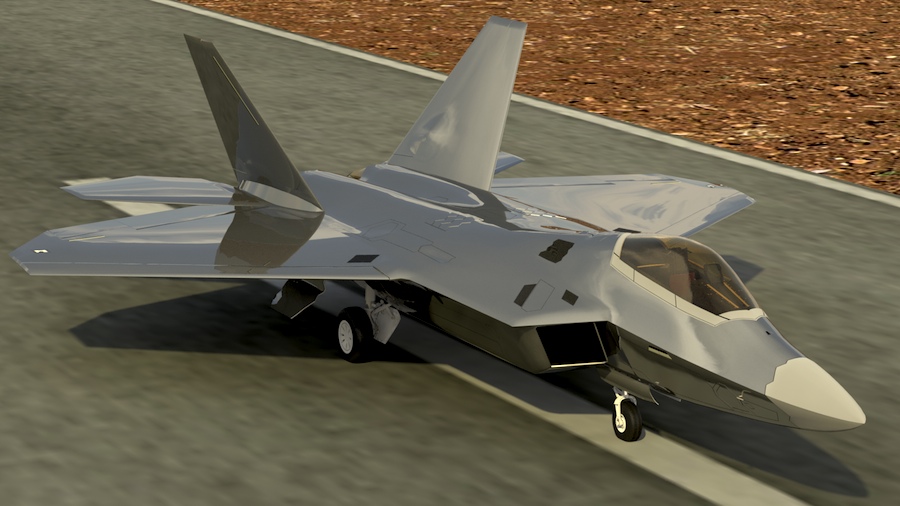
Welcome to the 2013 F-22 "Raptor" article.
At the time I'm starting to post this article, I've nearly finished the exterior airframe, have done quite a bit of the rigging, and have gotten a pretty good start on the cockpit detailing, landing gear details, etc.. My goal with this article will be to provide enough details on the process to interest other 3D modelers, but also to do it in a more concise way than my original article from 2008. Documentation on the aircraft (in the form of photos) has gotten better, simply because it's been in the public more, and various new tools available in MODO have made it possible for me to model the aircraft more precisely, and with less effort. If you have specific questions on any step of the process, feel free to email me. However, be aware that I am not going to redistribute any of the drawings or photos used in the process, because many of them are not mine to redistribute.
I hope you enjoy this much-improved model of a truly remarkable aircraft.
NOTE: Most images of this project were rendered at 1600 X 900 or larger, although they're limited here to fit in the article's space. If you drag them to your desktop, you can view the higher-res versions.
New methods this time...
Computer hardware and software has naturally improved greatly since I did the first F-22 model in 2007. MODO, in particular, has become an incredible modeling tool, and it's improvements are directly reflected in this model. Since I assume that most of you reading this article are familiar with basic 3D modeling techniques, I'll try to focus on what i think are MODO's "special" capabilities that were of particular use on this model.
Modelers may be interested to know that all major parts of the airframe were modeled entirely in hard-polygon mode, rather than sub-d, although sub-d was occasionally used in parts of the cockpit and landing gear. I'll point out the reasons why, as the article unfolds.
Here's an introductory movie on the project.
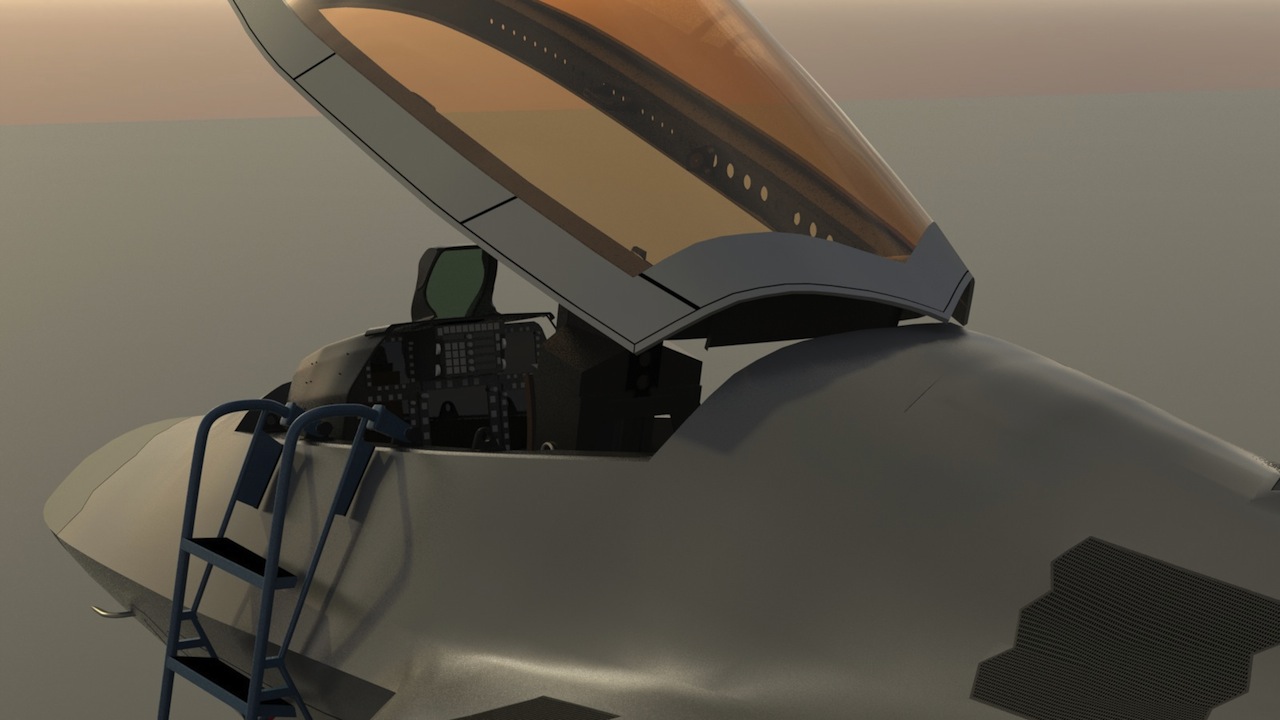
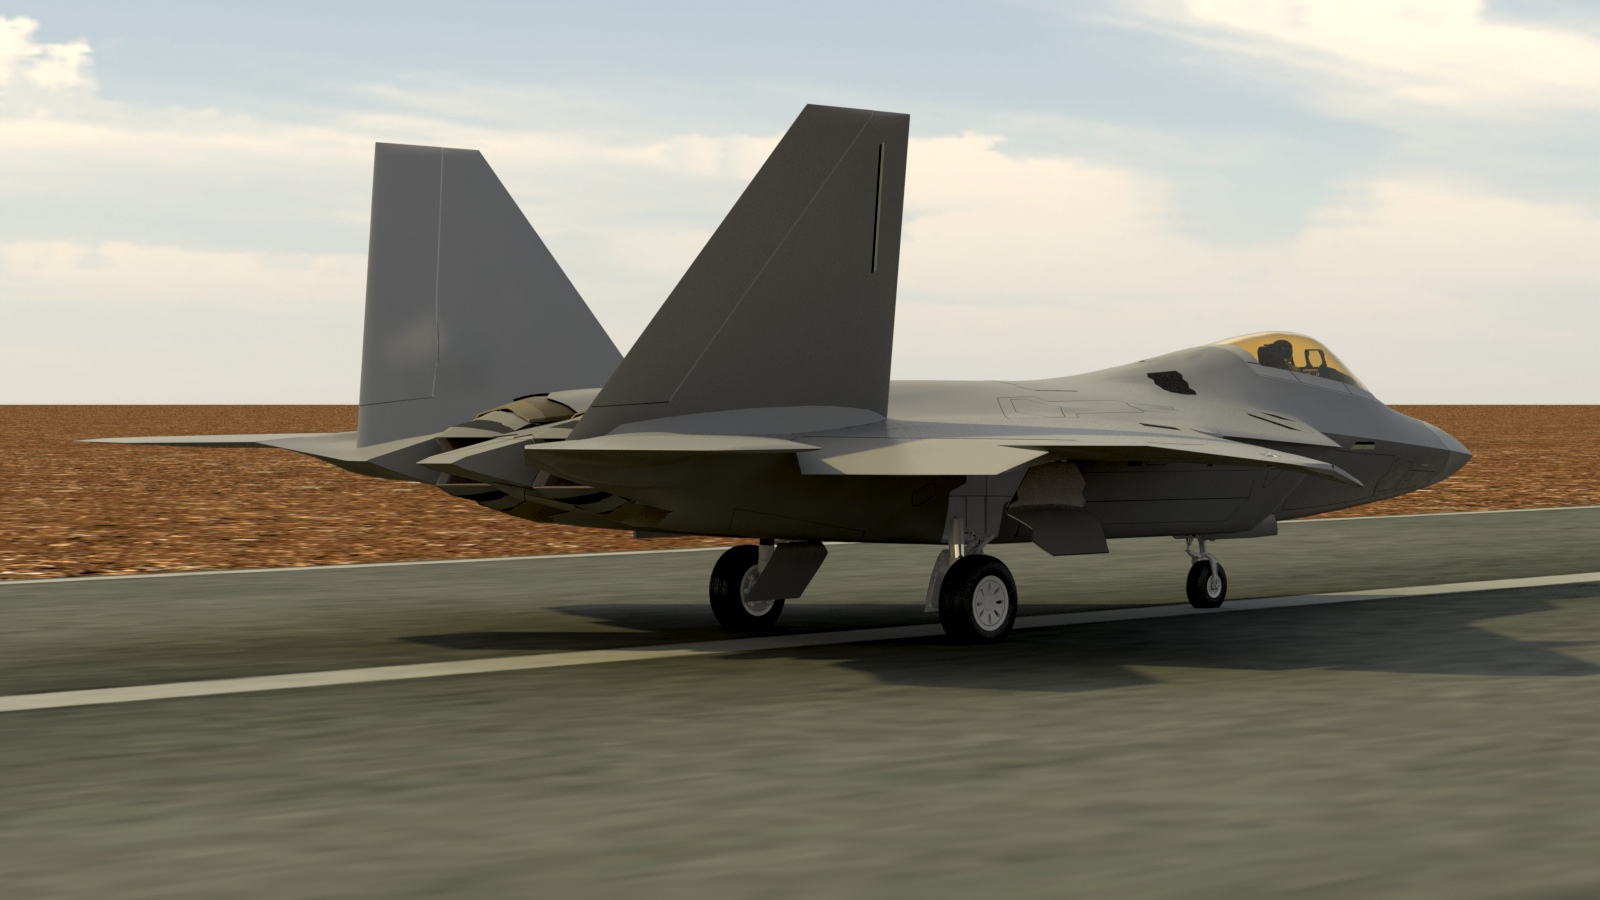
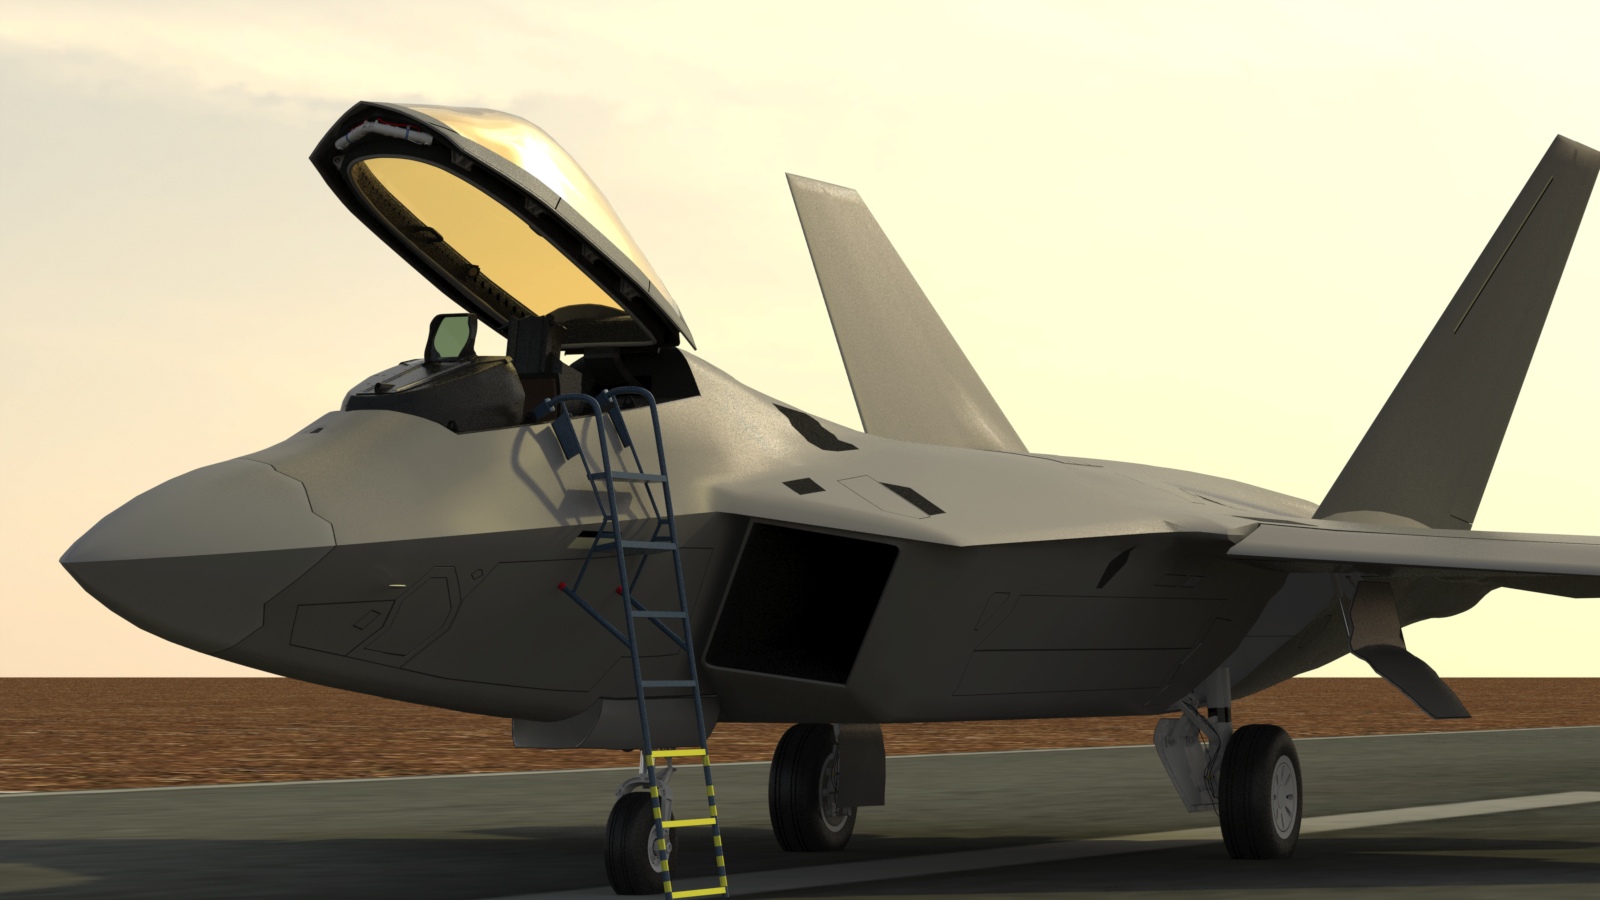
I'll be showing the earlier parts of the build on the following pages, but here are some preview images

"Suspicion breeds confidence."
There were several times during this project where I spent hours on a certain set of details,and then had to discard that work, in lieu of something I found in newer photos. As one example, take a look at these two photos of the main landing gear doors. See the differences?
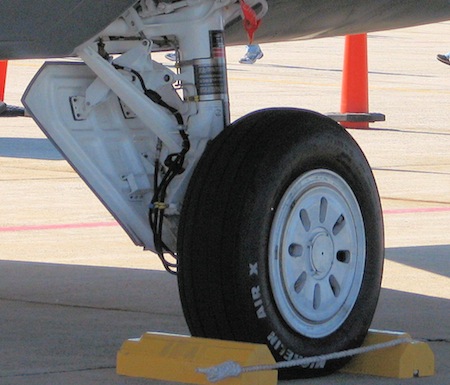
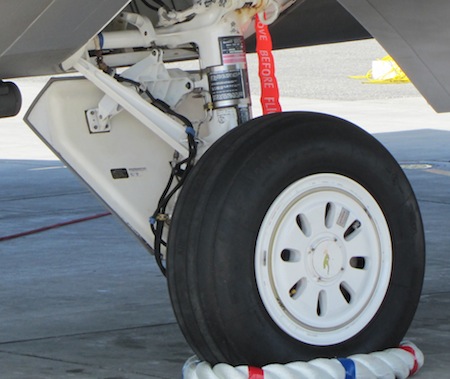
The gear door on the left is from an early model F-22, and the gear door on the right is how the final block was made. It's these details that can slip by you when plowing through a big pile of documentation, but that's life. These finds caused me to focus really hard on the rest of my documentation, so I wouldn't miss other differences. The good news in this case is that the later model door is simpler to model.
Unorthodox methods used on this project:
When I do work for customers, I adhere to their needs. Perhaps the model must be "all quads", or perhaps it must be sub-d, or perhaps it must be very dense and triangulated, for machining. Each project has it's own requirements, and I couldn't stay in business if I didn't meet those needs. However, when I do projects for myself, or projects that are intended for images and animation alone, then I can work much more freely. Some would call this "incorrect", or even "sloppy". I have no secrets here, so let me describe what I've done, specifically.
Take the case of an "Ngon", for example... (a polygon with that has more than 4 edges)
If you're modeling in sub-d, these can be problematic, and probably should be eliminated. But, in either sub-d or hard-poly mode, it's generally accepted that if you have an Ngon on a perfectly flat surface, it's irrelevant, because it won't show as a "defect" in a rendering. Most 3D modelers know this, and try and avoid them otherwise. There's another aspect to this, which has more to do with a "philosophy". That is, many modelers will avoid all Ngons, as a matter of personal integrity, regardless of whether the Ngon or other "illegal" polygons affect the rendering or not. The vast majority of this model adheres to these standards, but I solved several problems on specific areas of the model using some non-standard methods, and to me, that's what made it interesting.
As an example, imagine that you have to create a commercial airliner, with over a hundred window openings in the fuselage. You can do this in sub-d, but it would take a very long time, and the result would be a huge polygon count, due to the extra edge loops required. (or, in the case of MODO and some other 3D software, the combination of edge weighting and a higher subdivision level) Suppose that you do all that work, and then you or your customer decides that some changes are required. In sub-d, as you know, every change to the local topology affects the neighboring topology, and this can make editing such a model tedious.
My approach to this problem has been to use sub-d in the early part of the process, for it's great flexibility in creating smooth curves quickly, then "freeze" those polygons to hard polys, and use boolean cutters to create the openings. It's fast, relatively easy, produces nicely-renderable results, and results in a lower polygon count. It probably will create some Ngons, and you can choose to eliminate those or not. My decisions are simply based on whether their existence shows as any sort of defect in renderings or not. During the building phase, I render the model over and over, with highly reflective materials, to help me spot any issues. (image below) I'm not "cheating", otherwise, and am using MODO's default smoothing angle of 40 degrees. These extra-critical renders showed me that no errors were visible, and considering that the final finish on the model will be a much flatter and non-reflective material, I don't see any problems. Still, safety first. I always keep backups of the original sub-d files and the boolean cutters, in case I have to backtrack to the pre-freeze or pre-boolean state of the model.
Test render with highly reflective materials, to spot rendering errors.
Polygon "flow" is another subject worth mentioning. If you're modeling a humanoid character, for example, and intend to animate it, then polygon flow becomes very important. If your polygons don't flow correctly, the character may look odd when animated, due to pinching and bulging, and it might be difficult to animate in general. But... when you animate an aileron or a flap in a wing, that idea doesn't apply, since those are separate parts. The F-22 has some especially unusual combinations of shapes, (smooth curves, and rigid straight lines in the same areas) So, I used some methods that I hadn't used before, and they work very well, regardless of what some would call a "bad" polygon flow. If you're willing to retopologize your entire model, using the "bad" base model as the background layer, then you could easily (time permitting) restore all this "correctness". I simply chose not to, because everything works.
But...
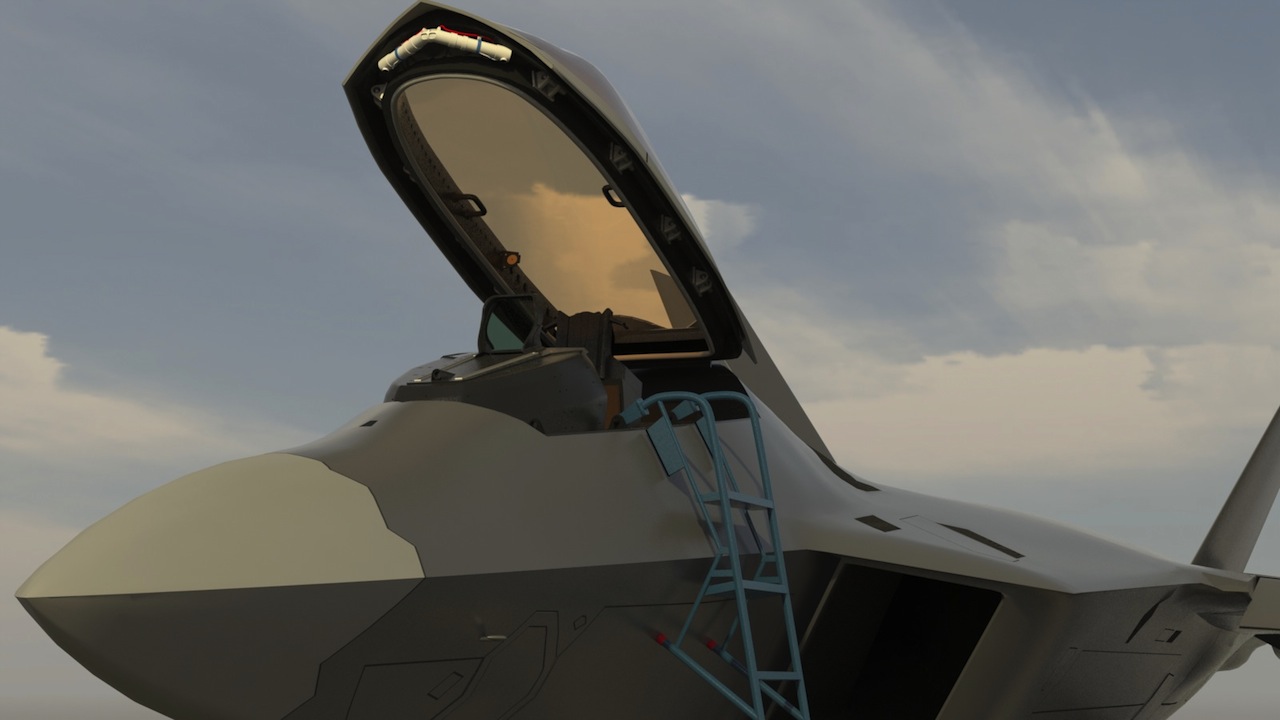
That doesn't mean "lazy". There are plenty of details built into this aircraft for my own learning and satisfaction, that most people will never see. (For example, the canopy jackscrew rotates as the canopy opens and closes.) That was worth more time to me than worrying about every Ngon on a hard-poly model.
Many people think of hard-poly models as impossible to edit, and in the case of a very dense, highly-triangulated mesh, I'd agree. But follow what I've done here with the F-22 model, and you'll see that in many ways, a hard-poly model is MORE editable than the equivalent sub-d version.
As I'm writing this page of the article, the model is far along, but still a work in progress. I wanted to show a few of these images in advance, to give you a feel for the final results. As the next part of the article forms, I'll start to show earlier parts of the project, and the methods I've been referring to.
Click the "Page 03" link below, to continue.