The "D. B. Cooper" Project.
NOTE: I am not at liberty to redistribute the documentation used to build this model.
The story of the infamous "D.B. Cooper" incident, in which a hijacker succeeded in getting $200,000 in cash ransom, and escaped by parachuting from the rear exit airstairs on a Boeing 727, happened in 1971, and the hijacker has never been found, either dead or alive, making it the FBI's only unsolved hijacking case. In late 2012, I was contacted to do the aircraft-related modeling and animation for work for a movie on this subject. That project now appears to be dead, having failed to obtain the financing it required. Regardless, I'll share the article showing the preliminary work I did for this project, as it may interest 3D modelers.
I had previously built a 3D model of the Boeing 727, which is how I became involved in the project. (See that article here.) Most of my customers are interested in the models' geometry alone, rather than photorealistic renders, so this project is one of the few opportunities I have to do that with animated sequences, and it's really quite exciting. In the first couple of pages of this article, I'll show the many things that have to be considered for the project, and the tests I did so square those away. Then, we'll get into the actual production process.
For me, there are several major steps: (More details as we go along)
- Paint and texture the model to look like the actual aircraft.
- Create the necessary animation rigging to accomplish what's required for all the scenes (more on that later)
- Provide image and animation sequence samples to the production crew, to ensure our shots will match, both in terms of the camera angles and movement, as well as the colors, lighting, etc..
- Render and deliver the final animated scenes as alpha-masked image sequences for compositing

MODO users will appreciate that on my end, this project is being done entirely within MODO, with no post-processing of files, no third-party plug-ins, etc.. It's an opportunity to show what MODO can do on it's own, and it's working out really well. Thank you, The Foundry!
First, the paint and textures:
The story of the infamous "D.B. Cooper" incident, in which a hijacker succeeded in getting $200,000 in cash ransom, and escaped by parachuting from the rear exit airstairs on a Boeing 727, happened in 1971, and the hijacker has never been found, either dead or alive, making it the FBI's only unsolved hijacking case. In late 2012, I was contacted to do the aircraft-related modeling and animation for work for a movie on this subject. That project now appears to be dead, having failed to obtain the financing it required. Regardless, I'll share the article showing the preliminary work I did for this project, as it may interest 3D modelers.
I had previously built a 3D model of the Boeing 727, which is how I became involved in the project. (See that article here.) Most of my customers are interested in the models' geometry alone, rather than photorealistic renders, so this project is one of the few opportunities I have to do that with animated sequences, and it's really quite exciting. In the first couple of pages of this article, I'll show the many things that have to be considered for the project, and the tests I did so square those away. Then, we'll get into the actual production process.
For me, there are several major steps: (More details as we go along)
- Paint and texture the model to look like the actual aircraft.
- Create the necessary animation rigging to accomplish what's required for all the scenes (more on that later)
- Provide image and animation sequence samples to the production crew, to ensure our shots will match, both in terms of the camera angles and movement, as well as the colors, lighting, etc..
- Render and deliver the final animated scenes as alpha-masked image sequences for compositing
MODO users will appreciate that on my end, this project is being done entirely within MODO, with no post-processing of files, no third-party plug-ins, etc.. It's an opportunity to show what MODO can do on it's own, and it's working out really well. Thank you, The Foundry!
First, the paint and textures:
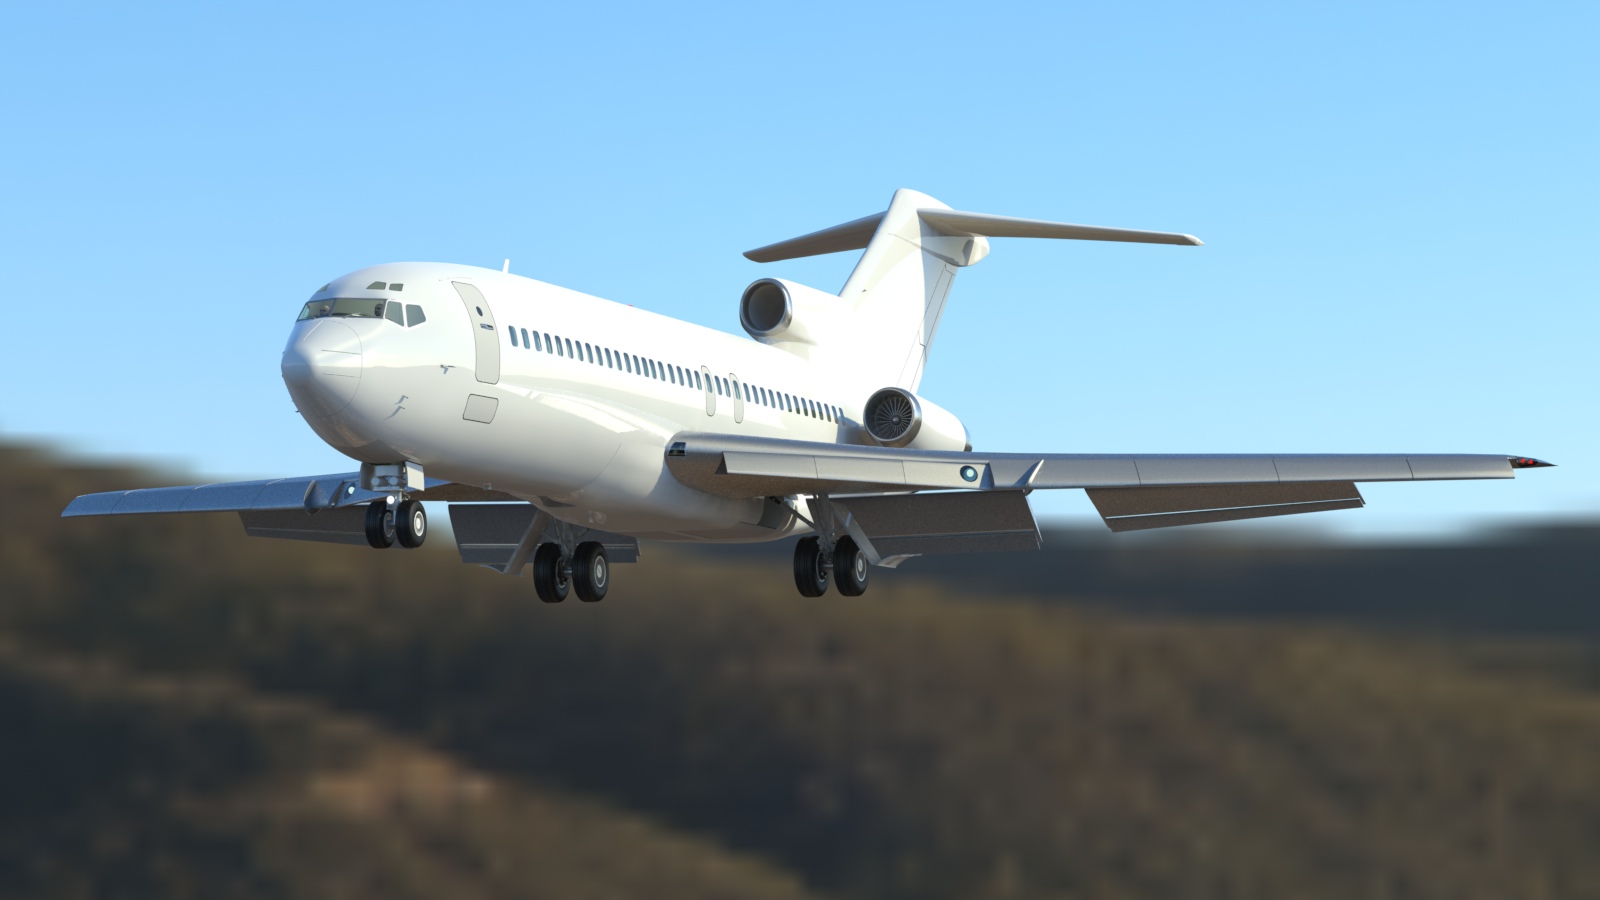
Most of my customers are interested in the models' geometry (and perhaps the rigging) more than the specific look of the colors and textures. At the time I was contacted for this project, my 727 model was in the state shown below. Accurate, geometry-wise, but generic in it's appearance.
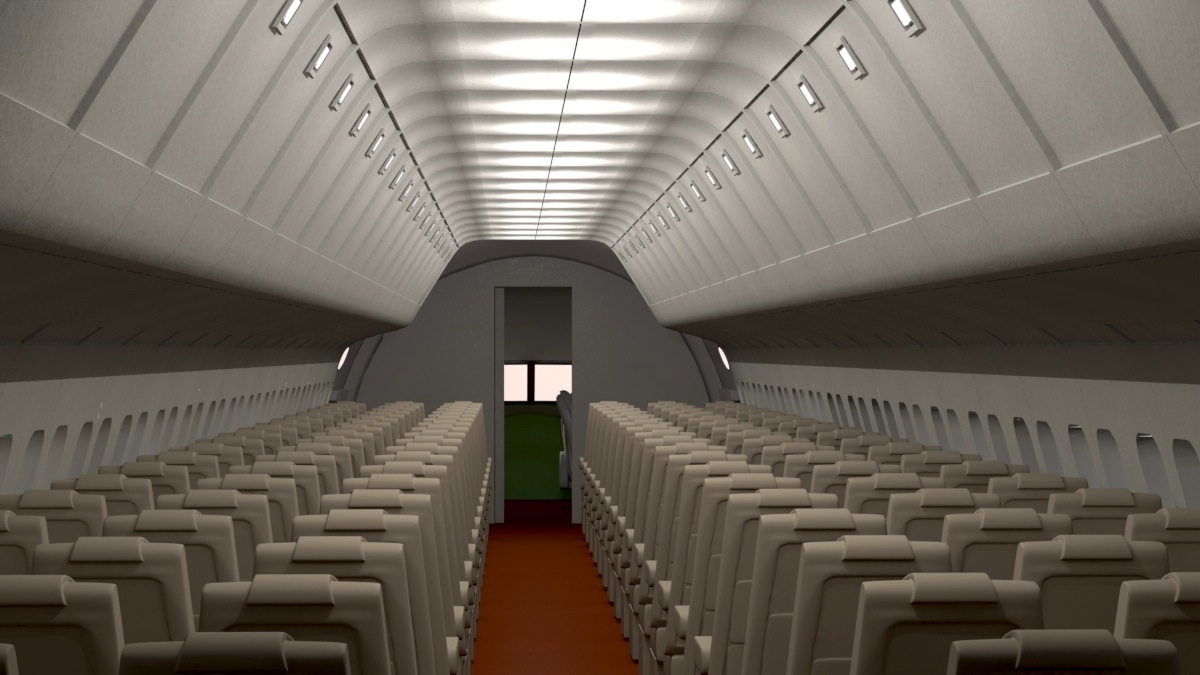
My pre-existing model had a moderately-detailed interior, (below) and that's important. Although no full-interior CG shots are used in the movie, these things need to exist, so that as the camera sees through the windows from outside, the aircraft doesn't look "hollow". I also added passengers and crew, providing silhouettes that add to the aircraft's "loaded" look. One other detail, for aviation fans... My original model (a 727-100) included a cabin door on the right side, directly opposite the one on the left. It doesn't actually exist on the 727-100, but was put there so that later, I could stretch this model into other configurations that do have that door. So, for accuracy in this movie, it was removed.
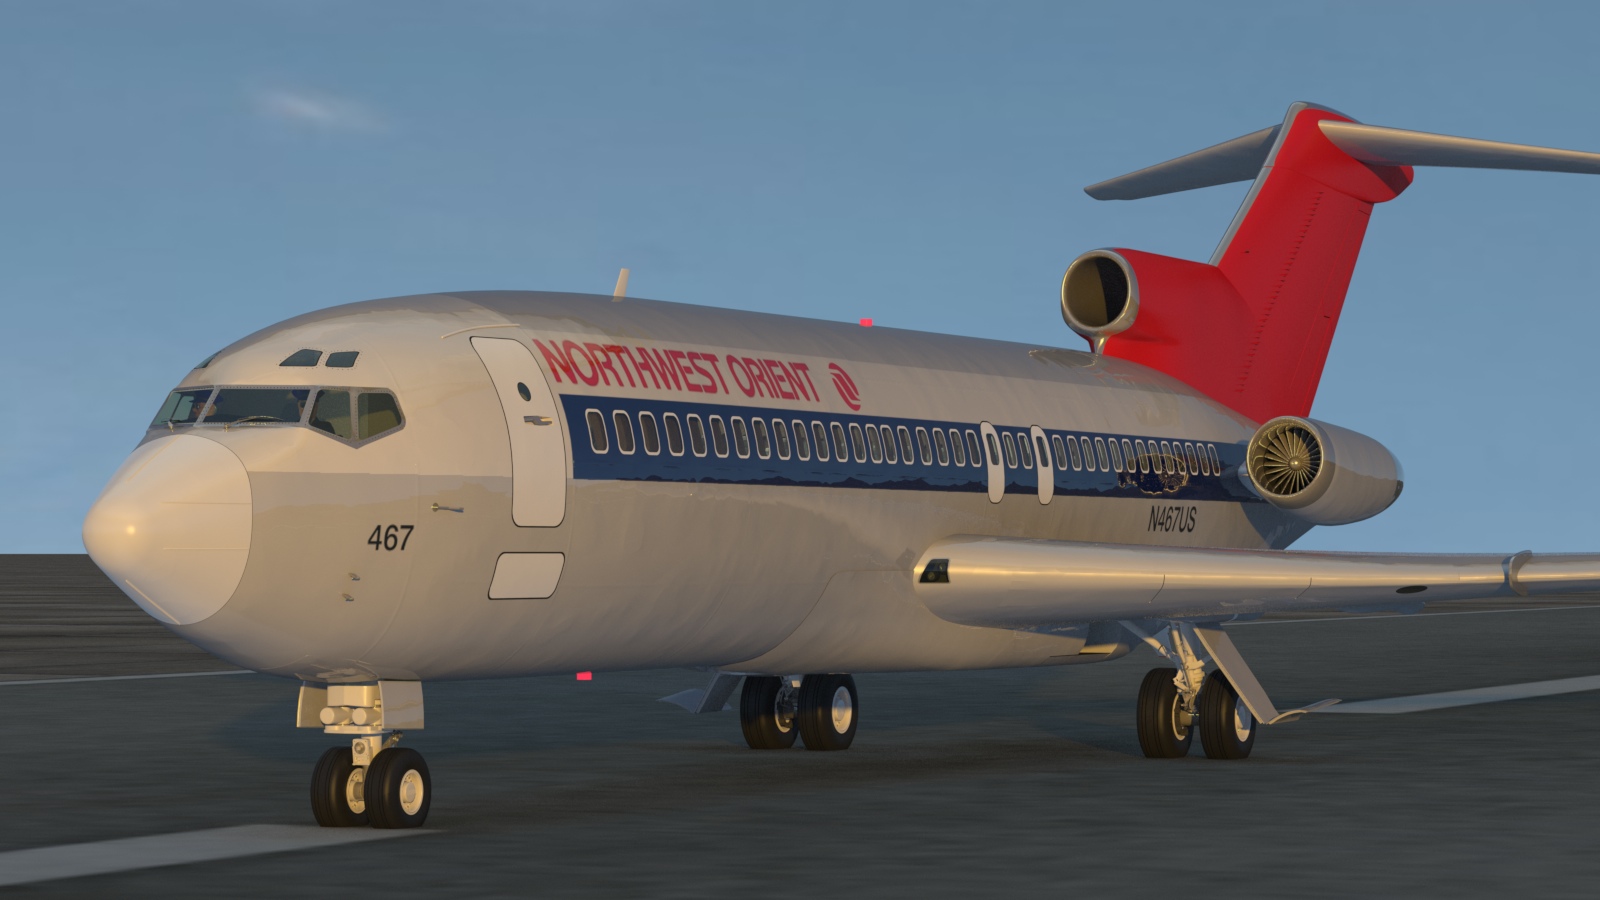
This incident is widely known, so it was relatively easy to find information on the specific aircraft, including the Northwest Orient paint scheme, and even the aircraft's N number. The first step was to add the basic paint colors. These are alpha-masked over a procedural shader-based "aircraft aluminum" material, for realism. Following that, I spent a great deal of time experimenting with gradients and other modifiers, to create a slightly wavy surface (as seen on actual aircraft) some panel lines, additional rivets, where they would show, and so on. Below, one of the early renders, with some of those things added. Some "weathering" may be added if it proves necessary, but remember that at the time of this incident, the 727 had only been in service for about five years, and were proudly maintained by the airlines flying them. At the time, they were "the latest thing".
Tests:
Throughout this article, you'll see a variety of tests, where scenes are rendered more than once, tweaking small settings, or making modeling changes, between them. Those are important, to help you catch defects that might only be visible from a certain angle, or to adjust lighting to match the composited footage, etc.. As each solution was found, it was "frozen" into a master file. Later, this master file gets broken up into a separate file for each scene. Most of the non-aircraft elements you'll see here will not appear in the movie, but are placed there as proxy parts, to aid in creating a feel for the scene and it's lighting. (For example, the runway and ground plane in most of these renders will be alpha-masked out, in favor of actual photographic elements.
The pre-existing aircraft had very little "rigging" per se. Instead, it had duplicate geometry included for items like the flaps, so that it could be posed in different configurations, by turning items on and off. While that worked well for still images, it wouldn't work for the movie, because these things have to be shown in motion. Landing gear and landing gear doors needed to extend and retract, the wheels need to rotate, turbine blades have to spin, the aft airstair door has to open and close, flaps and control surfaces have to move, etc.. I completed all of that first.
A variety of lighting conditions had to be set up too, both in terms of the environment, and the aircraft itself. Internal and external lights had to be switchable on and off, and variable in brightness. Some of them, like the red beacons on the top and bottom of the fuselage, and the strobes on the wingtips, have to flash at regular intervals. Finally, I had to come up with a reasonable depiction of the jet exhaust, which would work for both day and night shots. Here's an early test of the lighting features, using a one and a half-second loop. Below that, an example of the kinds of changes that were constantly made to the model as the project went forward, to add realism.
Lots of different things were tried, to see what looked best for the aircraft lighting. One addition was the extra landing lights in the Krueger flaps, located in the leading edge of the wings. Next, I changed the red flashing beacons on the top and bottom of the fuselage. The version shown above was created by controlling the beacon geometry's actual luminous intensity. During these tests, it became obvious that it was better to build these more like the actual aircraft. So, I created a "red glass" material for the beacon housings, and installed rotating spot lights inside them, giving more realistic results. I also offset the rotation of the top and bottom beacons, which adds realism. (In those days, these were actually motorized, rotating lights, rather than flashing LED types, so it makes sense.) Here it is below, where I'm also testing a slightly faster flashing rate. The nice thing about this method is that as the camera moves around the aircraft, the beacons and strobes appear to go out of phase with each other. Aside from being more realistic, it's more interesting.