See the Products page for info on ALL of my 3D tutorials.
MODO by The Foundry is, in my opinion, the finest 3D modeling tool set around. I've been immersed in MODO since September of 2008, and could not be happier. Support is excellent, and the online community is absolutely wonderful. This is my third volume in the "Modeling with MODO" series. Like the first two, It's set up to navigate like a web site, and includes screen-capture video at 1280 X 720, with audio. Some of the models and files in the tutorials are included too. (See below.)
I'm an advanced user, but don't consider myself a MODO "expert". MODO's capabilities are so deep that it would take anyone quite some time to truly master all of the tool combinations. And, we all work differently, so it's my hope that sharing the way I've used the tools will give you some ideas as to what will work for your own projects. At the time of this release, you might want to know that I've seen the latest The Foundry training materials, and have made a conscious effort to avoid duplicating that information.
- Mike James
Who is this for?
This set focuses on modeling, texturing, project management, and rendering in MODO. It's an intermediate set of tutorials for those that have done some 3D modeling, whether in MODO or another 3D application.
PRICE: $45
See the Products Page for options on purchasing multiple volumes at a lower price.
Jets!
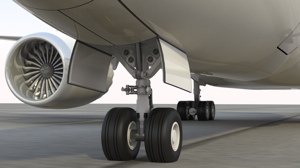
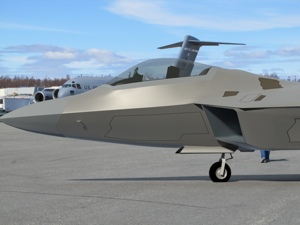
In my first two MODO tutorialss, I focused on techniques, rather than specific projects, and as you can see from the title, this one focuses on jet aircraft modeling. We'll be having a look at several types, from modern fighters like the F-22, to business jets, airliners, and bombers. The large jets, especially the airliners, present unique modeling challenges, so I've included articles on the landing gear, lighting, wing construction, interior, etc..
Some of my favorite fellow artists have created step-by-step tutorials, in which you build a particular model, just as they built it. Clearly, some people like that approach. But when I watch these, I never build the model shown. Instead, I try to learn the methods, and apply them to my own work. So, as with all my previous tutorials, this one is aimed at showing you the methods and the results, but is not a "step-by-step" tutorial that ends up with you having built the same model I did. That's not the point. Learning the "how" is much more important than the "what", and several files are included for you to use, the latest F-22 model itself is not. (But, there is a special price available. exclusively for MODO users who purchase this tutorial.) The methods shown in this tutorial can be applied to any modeling task, so have fun with it, and go in your own direction.
Preview movies: (Several Gigabytes of video included.)
I'll add more previews here, as the release date nears.
- Tutorial Tour (48 MB MP4)
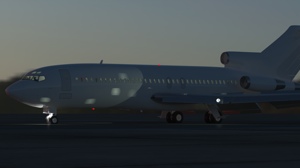
- Introduction to the Boeing 727-100 Project" (36 MB MP4)
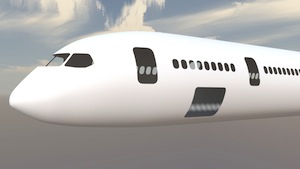
- Boolean cuts on the Boeing 787-8 (240 MB MP4)
- Using the "Local" action center (50 MB MP4)
- B2 Project Intro (142 MB MP4)
 General Tips, Demos, and (brief) Tutorials:
- Turbine engines - Easier than you think!
- Sub-d to hard polys, and back to sub-d
- Proxy objects and materials, to save your resources
- Tires, Wheels, Brakes, Brake Lines, Clamps, etc..
- Avoid modeling issues by saving some steps until later.
Modeling Methods in MODO (more detailed tutorials)
Some of the projects below are documented on my online web site. For your convenience, those articles are included in their entirety, as "Reference Articles". The tutorials themselves are all new material, not shown in those articles, and focus on the items shown in the "Purpose" column below.
Project
Purpose
Preview
Hierarchy is everything.
If you've built a small fighter aircraft, then consider building an airliner or large bomber, it may seem like too much work, due to apparent complexity. Actually, there's nothing more difficult about the tasks… simply more of them.
This set is hopefully going to help you see that no project is too big, with some reasonable planning and prioritizing.
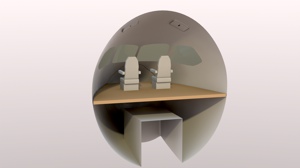
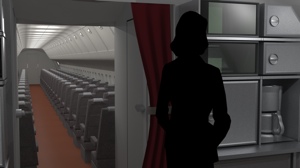
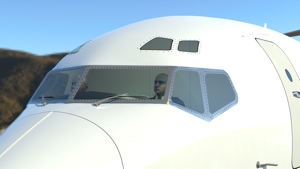
Separate files to save resources
Often it's smart to save a "module" from your model into a separate file. That way, you can continue working on massive amounts of detail in something like the cockpit area shown here, while not affecting the poly count on your "long shot render" model. It's also good preparation for the future, since, even if you're low on resources, you can come back to this as your hardware and software improves.
Proxy objects and materials
Complex shaders and objects make some models come to life. However, you don't need all of that during the modeling process. I'll show you some tips I've developed for using proxy objects and materials during the early and mid modeling phases, to save resources.
Render tips for scale subjects
Often, people create amazing, precision scale models, but their renders make them look less impressive… like "toys" or "miniatures". With some very simple planning as to how you set up your cameras and lights, you can give your models the proper sense of scale. I'll show you how I do it, and some lessons I've learned in the process.
Boolean operations and tips
On projects like an airliner, where a LOT of windows and other doors will be cut out of the parts, I use booleans. I've been doing that for many years, and have developed a reliable system, including a process that takes some parts from sub-d to hard poly, and back. I think you'll find the boolean tips useful, and see the geometry savings associated with changing parts back and forth between hard poly and sub-d.
Liners for your parts
Sometimes, our infinitely-thin parts just won't look right in a render. In the case of aircraft, it's often more intricate than simply thickening the sides. I'll show you the method I've developed to do these "liners", and how to save a lot of resources, using replicators for some of them. (building the liners in a modular fashion)
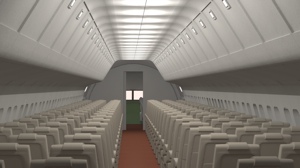
Interior Detailing
Once you've got your "liner" built, (above) then it's time to think about other details. Again, replicators come to the rescue to save resources, and I'll show you my methods for using them, while maintaining the ability to edit them easily in the future.
On the Boeing 727-100 project, I also discovered a way to save resources by extruding geometry from the walls, rather than creating it separately.
Replicators - A HUGE savings!
I've mentioned replicators several times above, and in these recent projects, I really saw a HUGE savings in resources, by using them intelligently. Of course, you can use them as shown here, to replicate your entire model, producing a "fleet". But they're much more useful to use on the many small parts that will repeat, (knobs, switches, bolts, etc.) in most models.

"Tricky" materials and rendering
If you're a Shader Tree expert, you'll already know this, but it pays to use some care when preparing your materials. Again, the reason is to save resources, in both your modeling workflow, and your render times. I've learned to optimize the use of images, since MODO gives you so much control over them, and find that often, they're faster (and better!) than complex shaders.
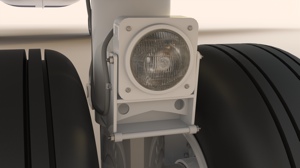
Interior and Exterior Lighting
Since the source of 3D lights doesn't show in renders, (without volumetrics) there are tricks to learn about mimicking internal and external lights on a model. Using the Boeing 727-100 project as the prime example, I'll share what I've learned about this… Lights, luminous polygons, images, and reflectors are all included in the Boeing 727-100 file, so you can see how they work.
Modeling the final details
I'm always concerned with saving system resources, even if I have plenty of room. It just makes sense to be economical, rather than sloppy. I'll share what I've learned about "saving the best for last", when it comes to the final details, and why I use that approach for clients, too.
Compositing for realism
Over the last few years, with the increased availability of better digital cameras, and the whole HDR phenomenon, I've been able to composite many of my models more realistically. Even if you're not attempting to be completely photorealistic, these tips can help add some interest and depth to your renders. The advantage of knowing how to do it is that, as better photos or other backgrounds become available, you can improve the look of your work.
Scenes, Models, and Materials included:
Some reference and texture images are copyrighted, and cannot be included. However, ALL geometry is included, as it stands at the time of this release.
- The complete Boeing 727-100 model
- The complete Boeing 787-8 model
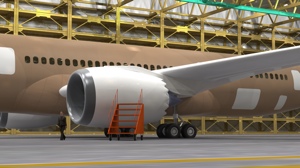
- The complete Boeing Manufacturing Building model
- The complete F-22 model
- The rather incomplete, but interesting B2 Bomber model start
- The moderately-complete Gulfstream G650
- A "library" of nuts, bolts, knobs, etc., that you may find useful, as well as a library of proxy materials that look good, but save a ton of resources (included in the individual model files)
Though incomplete, the B2 Bomber and Gulfstream G650 are included, so you can see how these projects look while they're in progress, and to give you two projects to complete in your own way, using the methods shown in the tutorials.